
Installation Instructions
Clever Filled Pet Hydration Station
Installation Instructions – Method 1 –
Siphon from Toilet Reservoir
Tools:
Phillips #2 Screwdriver or Drill motor with extension and Phillips Standard (PH2) Bit
Drill Bits 1/8” for securing to wood paneling or studs
1/4” for securing to sheetrock with wall fasteners
5/16” for routing ¼” pipe through finished cabinetry
3/8” for routing ¼” pipe through walls and floors
Congratulations on your purchase of the world’s best pet hydration station. It has been thoughtfully designed, hand-assembled and fully tested in the USA for maximum performance and ease of installation. When installed per these instructions, your water bowl will provide many years of trouble-free operation. Please use the QR code above if you prefer to see a video that explains these written instructions.
Warnings:
Failure to follow these instructions could void your warranty, result in water leaks and/or damage to property and possible personal injury due to slip and fall. Please read through all these instructions prior to installation and operation of your new CleverFilled water bowl.
A. Your water bowl must be installed onto a vertical surface such as a wall or cabinet base.
Installation Instructions:
1. If your toilet has a flushing mechanism on the top of the lid, check to see if there is a location to pass the ¼” water supply line out the back. If it does not have a manufacturer provided gap, you may need to choose an alternate water source. (Installation Method 2 or 3)
2. Decide on the preferred location of the Clever Filled Bowl., keeping in mind that you will need to find a path from that location back to the toilet reservoir tank. The ¼” plastic tubing is designed for potable water use and can easily be run up to 25’ from source to water bowl. You can easily snap a 90 degree corner over the pipe and keep it neat and linear with the provided adhesive clips. Consider running the supply tubing in a basement, crawlspace, through interior walls, under your base cabinets or hidden under base cabinet toe-kicks. When choosing a path, be sure to check for and avoid damaging any ducting, plumbing, electrical or other hazards in walls and floors. A good stud-finder or borescope can help identify obstructions. A 3/8” bit will be optimal for installation of pipe through walls and floors. You can also allow a drill bit to just break through sheetrock and then use a long probe (like a chop stick or kebab skewer) to check for obstructions. If drilling into a crawlspace or basement, check below before drilling and consider using a 24” or longer drill bit to drill at an angle through the wall sheetrock, and through the framing bottom plate to avoid having to drill through a floor.
3. The siphon works optimally when the rim of the pet water bowl is mounted at or below bottom of the toilet tank. This is usually 15”-18” above the floor. The rim of the bowl for a medium sized dog is generally best at 12”-13”. Use tape to affix the template to the wall and insert the bubble level provided to mark the holes and make the device level. It is best if the center hole can be located onto a stud, but the device will be well secured if all 3 wall anchors are used.
4. Drill holes where indicated using a 5/16” bit if mounting on sheetrock with provided anchors. Use a 1/8” bit if mounting to wood paneling or into a wood wall stud.
5. The wall mount bracket is designed to allow the water inlet pipe to enter from top or bottom. Choose the best path for your installation and push the inlet pipe into the corresponding pipe-keeper groove.
6. Close the blue valve handle on the top of the device in order to slide the tank front straight up. This allows you to screw the device to the wall and also allows the water bowl to be removed for cleaning. With the water bowl removed, the larger reservoir can also be removed for cleaning. It is held in by gravity and simply lifts up at the front to allow the back end to hook & unhook into the wall mount assembly. Remove both the bowl and the larger reservoir to install the screws. The center hole will require an extension to install the screw through the float protector.
7. For sheetrock, push the wall anchors in first and then use the screws provided to attach the wall mount bracket to the wall and be sure to confirm it is level.
8. Run the pipe per the instructions above and be sure to keep any exposed pipe tight to walls and other surfaces to avoid sharp teeth! If you have a puppy or dog that likes to chew, we recommend a bitter anti-chew spray be applied as well.
9. Use two of the supplied 90° bends to form a hook over the top of the toilet tank. Choose a location at the back of the tank that will avoid obstructing the plumbing parts inside the reservoir. Some tanks will have notch below the lid, but for some tanks, the double 90’s will need a gap created. In this case, use the supplied lid gasket.
10. Install another 90° bend so that the pipe rests on the bottom of the reservoir. Cut the pipe leaving a tail for the inlet filter. Push the inlet filter onto the pipe end, assuring that you insert the pipe approx. ¾” (19mm) and place it where it also does not obstruct any reservoir plumbing parts, such as the chain, float or flapper valve. You may need to adjust the 90° bend to achieve this.
11. It is critical that any person who might be responsible for bathroom cleaning be informed to NEVER put cleaning products in the toilet reservoir. They need to be made aware that this is a water source for a pet and needs to be kept chemical free to avoid potential pet poisoning. To reinforce this message, a warning sign is provided in English and additional space is provided for you to repeat the message in any language applicable to your home.
12. Because a toilet reservoir is refilled with fresh, domestic water with every flush, it is ideal for pet hydration. Some municipalities and private wells may create natural sediments or other environmental contaminants that settle on the bottom of the tank. The inlet filter is designed to keep these from fowling the pet’s water, but it is also a good practice to check for and remove them, if present. If any sediment has built up in your tank, a few feet of flexible plastic hose can be purchased at a hardware store to create a siphon from reservoir to toilet bowl.
13. When you are ready to fill the bowl, swing the siphon orifice out into a comfortable position and place the syringe onto the end of the ¼” pipe. Pull back on the plunger to draw water into the water bowl. Once water reaches the syringe (usually 1-2 pulls) you have created the siphon. As a precautionary measure, every bowl comes with a small cap to push onto the end of the siphon orifice. Push this full on and swing the pipe back into the device so that you can close the tank front. Be sure to turn the ball valve back on, which also locks that tank front down. Water will start to fill the reservoir and water bowl. Please be aware that it will take approximately 7-10 min to fully fill, depending on the length of tubing and the height differential of the siphon.
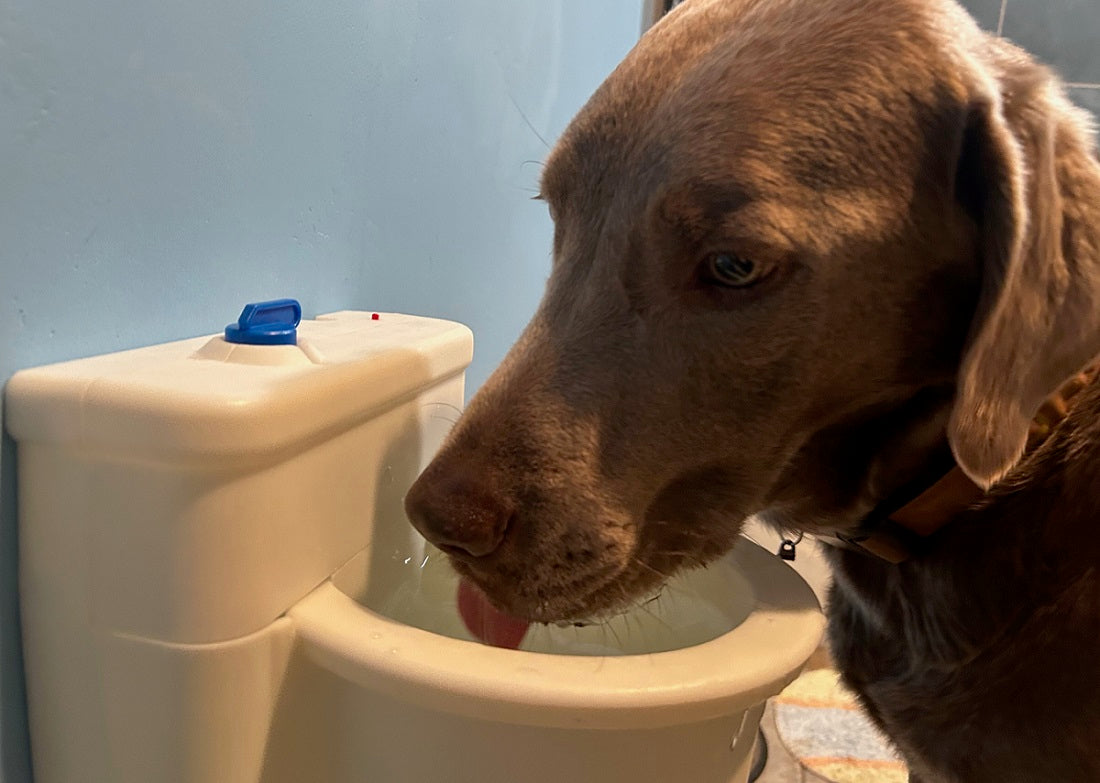
The CleverFilled Bowl
Clever engineering has solved your biggest compaints with providing water for your dog!
- Never let your indoor bowl go dry again! Our bowl safely refills endlessly as the pet drinks, with no plumbing or elctricity required!
- A self-filling bowl can be small and light. This makes it easy to clean and wastes less water.
- The small bowl contains the splash that can occur with long tongues and floppy flews.
- A wall-mounted bowl can be installed to your pup's perfect height. And wall-mounted means your family and guests will never trip on the water bowl again!
- When your pet drinks, fresh water flows! Your dog prefers this!